
How to Make Shoes Non-Slip: 12 Proven Tips

If you live somewhere that gets a lot of rain or snow, or if you work in a place where the floors tend to be slippery, you’ve probably wondered how to make your shoes more slip-resistant. New shoes—especially those with leather or plastic soles—can be just as slick as older shoes that have been worn completely smooth, making it easy to lose your footing.
Slippery shoes aren’t just annoying; they can also be a safety hazard. No one wants to deal with tripping, falling, or even damaging things around them just because their shoes don’t have enough grip. The good news is that you don’t have to toss out a perfectly good pair of shoes—there are plenty of easy ways to add traction and make them slip-resistant.
If you’re tired of struggling with slick soles, Vessi shoes could be a great alternative. Our waterproof shoes are not only lightweight but also designed to stay stable on wet and slippery surfaces. Take the Vessi Everyday Sneakers, for example—they feature a slip-resistant Herringbone grip with etched grooves that help keep out water while providing extra traction on snow and wet ground. That means better balance and stability, no matter the conditions.
But if you already have a pair of shoes that feel way too slippery, don’t worry—we’ve got some tips on how to make them more slip-resistant. Let’s dive in!
How to Make Shoes Non-Slip
1. Breaking in outsoles
One of the easiest ways to make your shoes less slippery is by roughing up the outsoles a bit—basically giving them a little wear so they grip the ground better. If you’re okay with adding a bit of texture to the soles, here’s how you can do it.
a) Scuffing the outsoles on abrasive surfaces
A super simple trick to prevent slipping is to scuff up the bottom of your shoes. You can do this naturally just by walking on rough surfaces like concrete, gravel, or stone. If you’re in a hurry, you can drag the soles across something coarse to help break them in faster. The idea is to get rid of that overly smooth finish so your shoes have more traction and don’t feel like ice skates on slick floors.
This method works great for new shoes, but you’ll want to be careful not to overdo it. If you scuff the soles too much, you could end up wearing them down too fast, which might affect their durability. The goal is just to add enough texture to improve traction—not to completely wear out your shoes before you’ve even broken them in!
b) Using sandpaper
You can use sandpaper to add some grip to your shoes—it’s quick, easy, and super effective. By roughing up the outsoles a little, you’ll create more friction, which means way less slipping on smooth surfaces. All you need is a piece of 50-grit sandpaper and your shoes. That’s it!
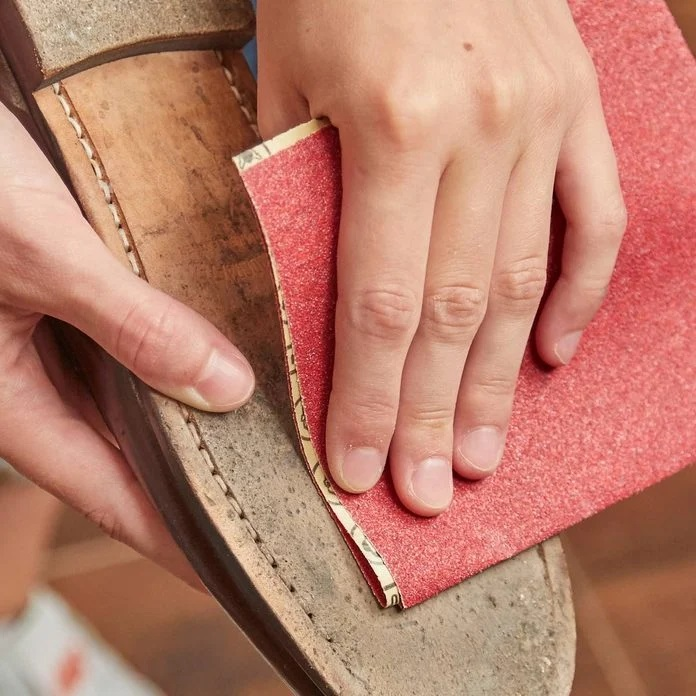
Image Source: familyhandyman.com
Here is how to use sandpaper to scuff the shoes' outsoles:
- Hold your shoe nice and steady. You want a good grip so you can sand the sole evenly.
- Rub the sandpaper over the outsole gently! There is no need to go too hard on it; it's just enough to roughen things up without damaging the material.
- Focus on the spots that hit the ground the most. Keep sanding until the sole has a bit of texture. That extra grip will make all the difference.
It’s a simple trick, but trust me, a little sanding goes a long way!
c) Using nail file
It might sound kinda random, but a nail file can actually be pretty handy for adding grip to your shoes. The metal part works like sandpaper, helping to scratch up the soles. If you just want to target specific spots instead of scuffing the whole sole, a nail file is perfect for that.
Just take the file and gently rub it along the bottom of your shoe. Don’t press too hard—you just want to rough it up a little, not destroy it. Coarse metal files are ideal because they’re tough and easy to carry around when you need them.
d) Scoring the bottom
Another simple way to make your shoes less slippery is by scoring the soles. Basically, you make some shallow cuts or scratches in the rubber to create more texture for grip. You can use something sharp like a razor blade or box cutter for this.
Just make sure you’re not cutting too deep—you don’t want to wreck your shoes. And if they’re brand new, you might want to skip this method since it can wear them down quickly.
Here’s how to do it:
- Clean the soles and let them dry.
- Hold the shoe firmly with the sole facing up.
- Score the bottom with diagonal lines—or you can try vertical lines or a wavy pattern if you’re feeling creative.
- Go over it again with diagonal lines in the opposite direction to make a crisscross effect.
It’s a pretty easy fix, but just don’t go overboard. You want to add some texture without ruining your shoes.
2. Using adhesive bandages
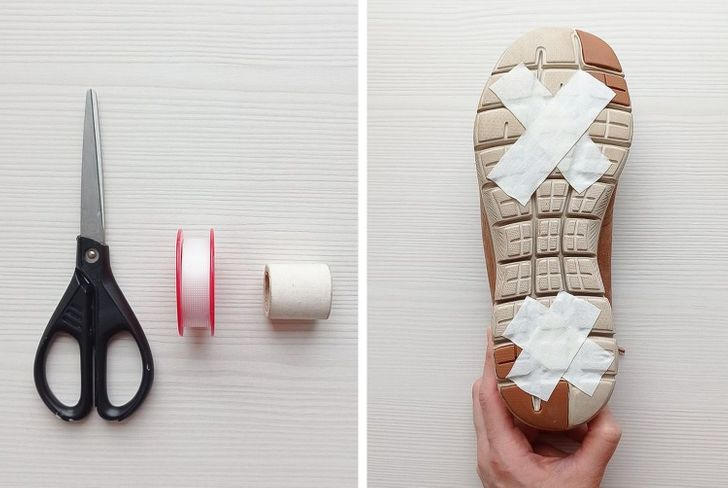
Image Source: 5minutescrafts.site
If you’re looking for a super easy, temporary fix for slippery shoes, adhesive bandages are the way to go. They’re cheap, quick, and get the job done. Just stick the rough side down on the soles, and the texture will help keep you from slipping.
Here’s how to do it:
- Clean the soles and let them dry for a couple of hours.
- Peel off the backing on the bandages.
- Stick them on the soles diagonally, and throw one across the heel too.
- Press them down for a few minutes, so they’re nice and secure.
You can wear your shoes right away, but if you can, let them sit for a few hours—or overnight—before you put them on.
3. Using grip pads
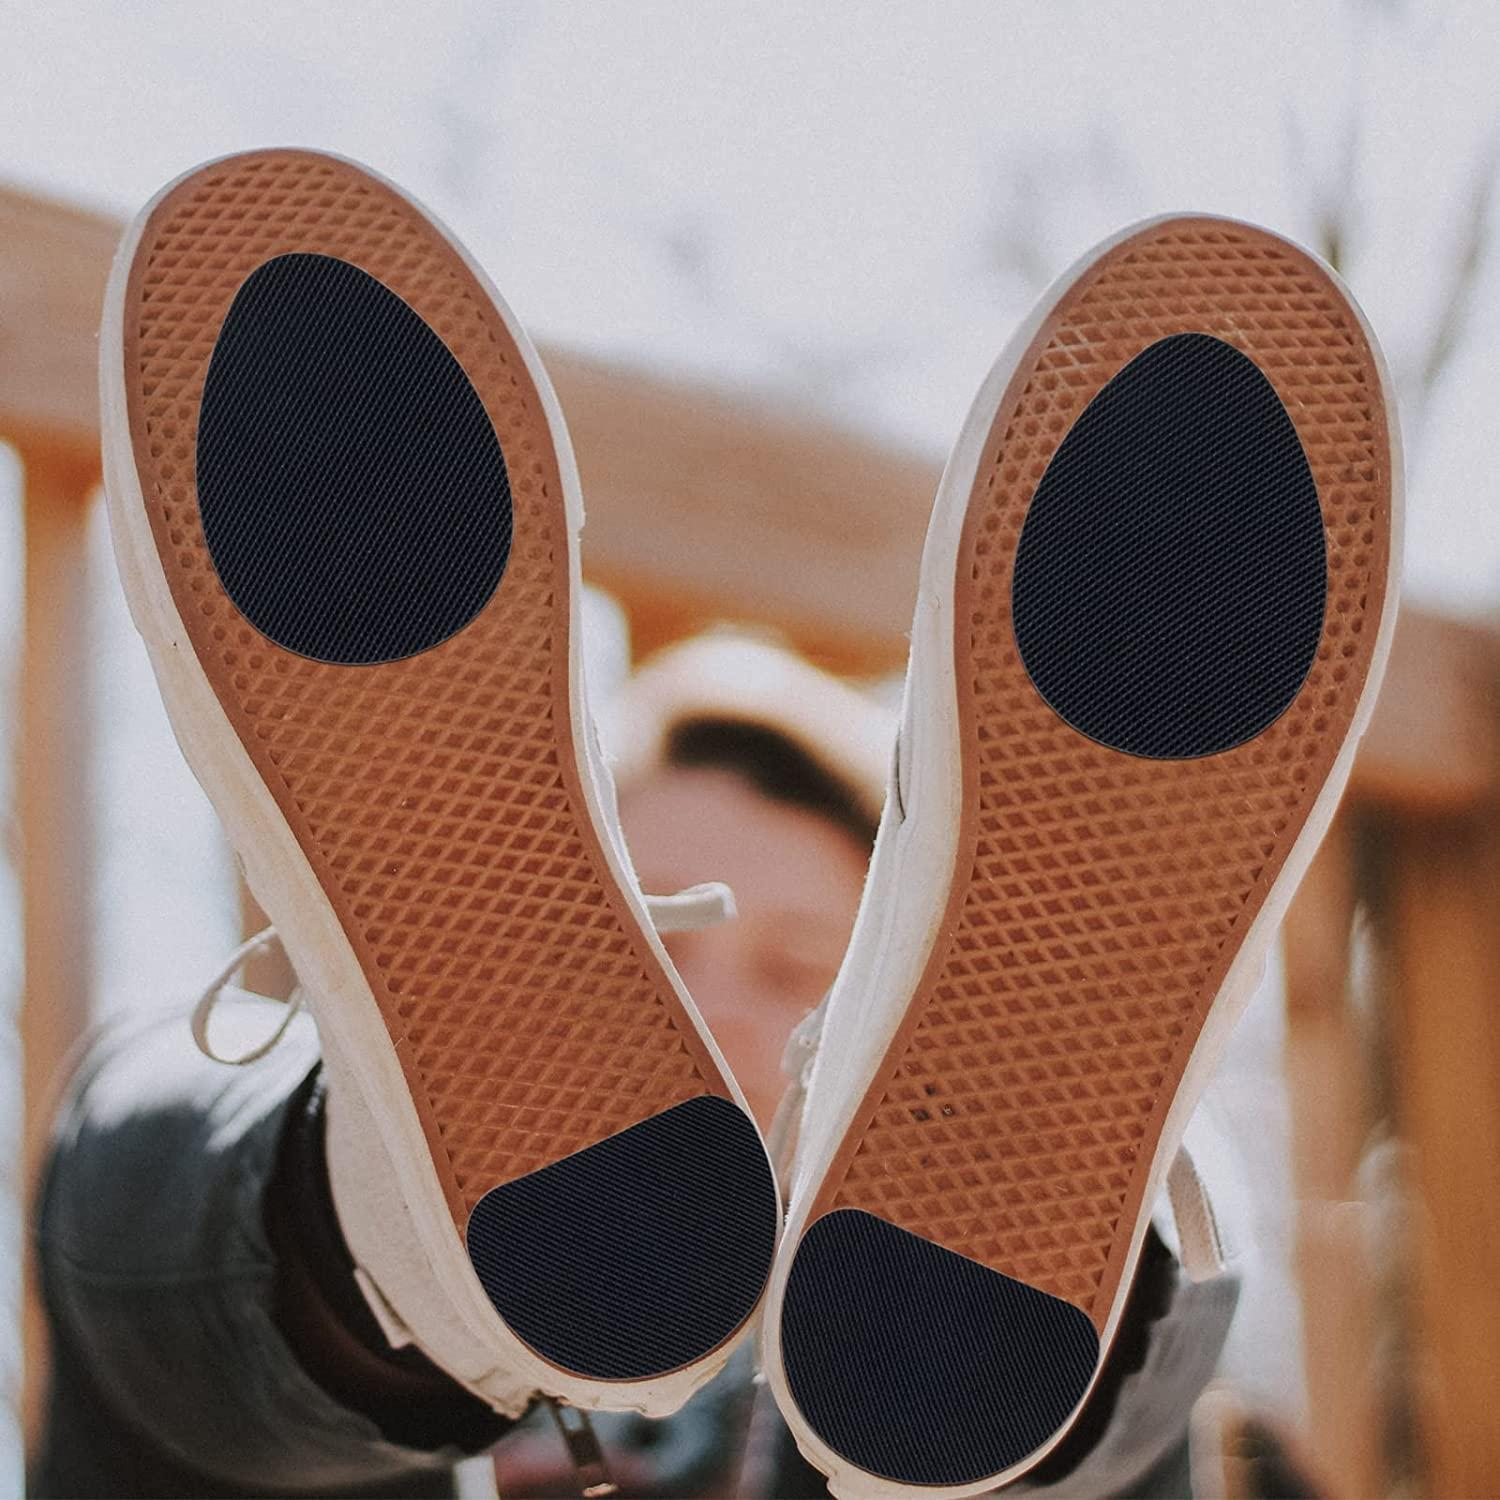
Image Source: gosupps.com
If you want a super easy, non-permanent way to make your shoes less slippery, grip pads are a great option. These little mats stick right to the soles and give you solid traction. They’re made with rubber or a grippy surface, so they’ll protect your shoes without changing their structure. Plus, they work on both new and old shoes.
Here’s how to use them:
- Clean the soles of your shoes and let them dry completely.
- Peel off the backing of the grip pads.
- Stick them to the heel and toe of your shoes.
- Press down firmly for a few minutes to make sure they stick well.
Leave your shoes for about 12-24 hours to make sure the grip pads fully adhere.
Grip pads come in different shapes and sizes, so just make sure you pick the right ones for your shoes. If they start peeling off, you can always re-apply them with shoe adhesive—just make sure to remove any old sticky stuff first.
4. Using hairspray
Hairspray is another easy way to make your shoes less slippery. It has a chemical that makes the soles stickier, which helps with traction. It’s a good quick fix, but keep in mind it’s not super durable, especially in wet conditions, since it can wash off.
Here’s how to use it:
- Clean your soles and let them dry.
- Spray a good amount of hairspray onto the bottom of your shoes, but avoid the upper part.
- Let it dry and get a little tacky.
It’s a fast and easy fix; just not the most long-lasting.
5. Using traction spray
Another easy way to boost traction is with traction sprays (also called grip sprays). These sprays are designed to make the soles of your shoes stickier, which helps on slippery floors. They're especially handy in winter when roads are icy or wet. Just remember, they don’t last forever, so you might need to grab more if you’re using them a lot.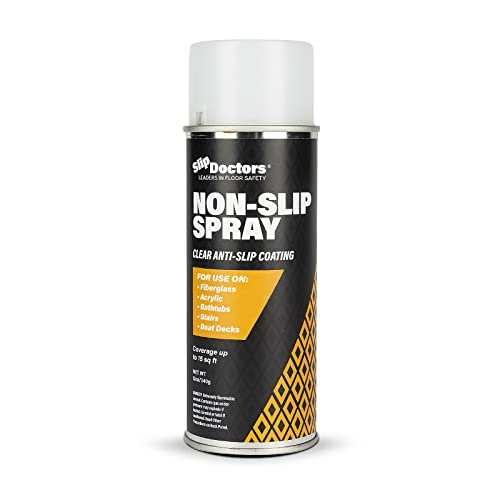
Image Source: bdeteletalk.com
You can use traction spray on anything from dress shoes to sneakers to winter boots. Just make sure you follow the instructions carefully since using it wrong could mess up your shoes—and we don’t want that.
Here’s how to use it:
- Clean the soles of your shoes well.
- Spray the soles evenly with the traction spray—don’t go overboard!
- Let it dry for 3 to 4 hours.
It’s simple and effective; just make sure you’re using it the right way!
6. Using puff paint
Puff paint is usually used for arts and crafts to make cool 3D designs, but it can also work to add grip to your shoes. It comes in different colors, and you can use it on rubber, fabric, metal, and even wood. When it dries on your soles, it creates a rough texture, making your shoes less slippery. Plus, it’s a fun way to add some personal style to your kicks.
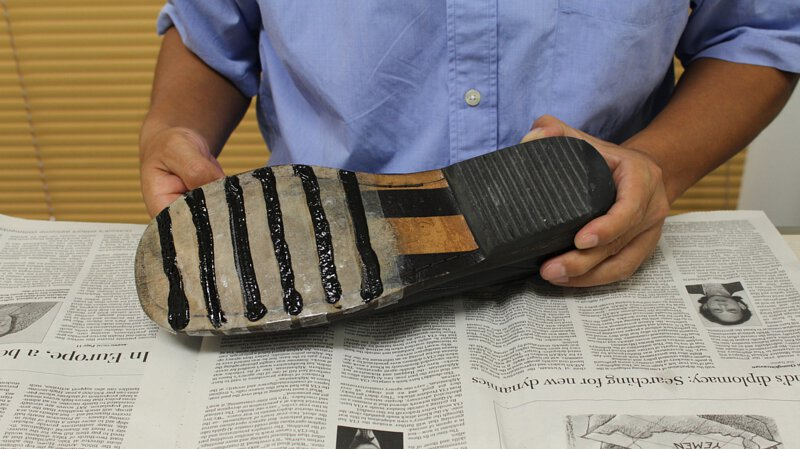
Image Source: shoegoohk.com
Here’s how to use puff paint:
- Clean your soles to get rid of any dust or dirt.
- Let them dry completely.
- Apply a thin, even layer of puff paint on the soles, but don’t get it on the upper part of your shoes. If you do, don’t worry—there are ways to remove it.
- Let the paint dry for a few hours, or overnight, before wearing your shoes.
Puff paint can last longer than hairspray, but you’ll probably need to reapply it every week to keep your shoes as slip-resistant as possible.
7. Using ice grips
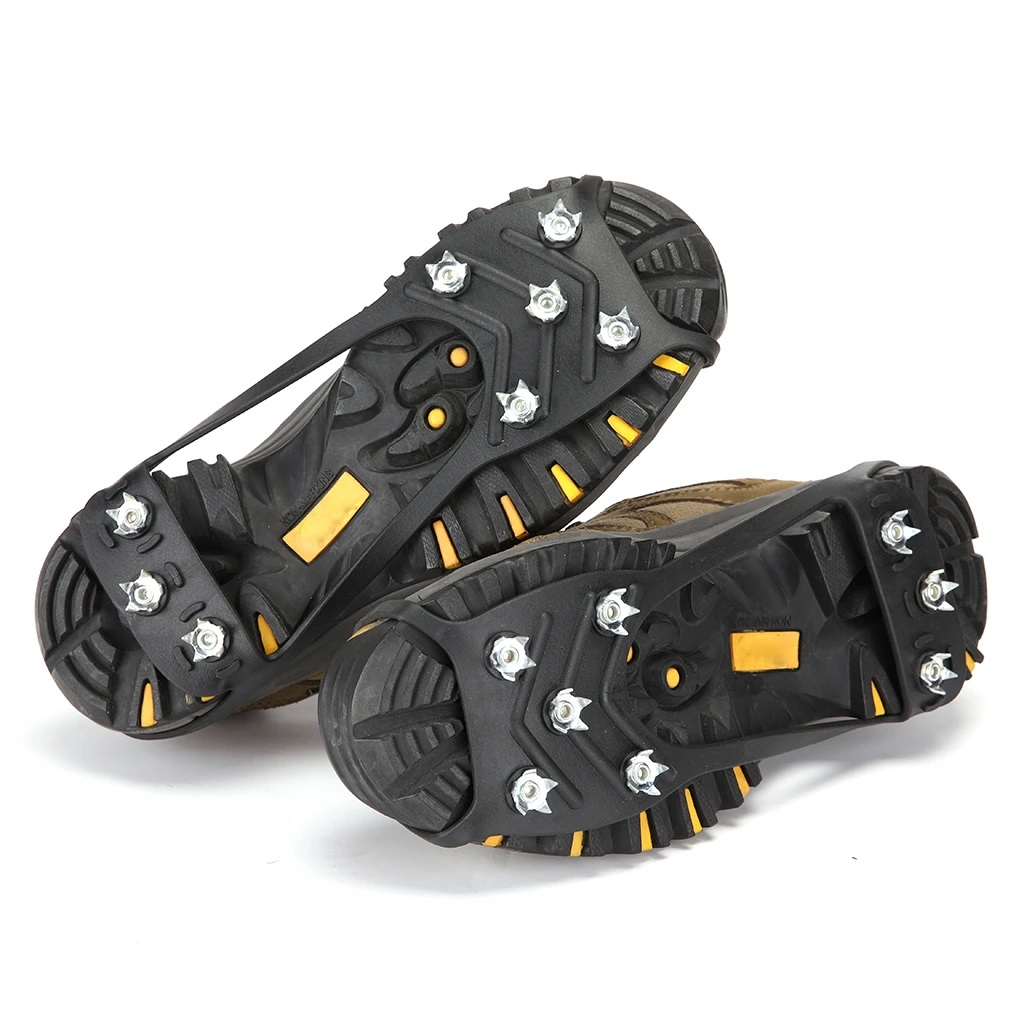
Image Source: muelbnd.top
If you want to make sure you never slip, especially on crazy stuff like icy mountain roads or muddy ground, ice grips are the way to go. These little accessories attach to your shoes and give you serious traction on slippery surfaces. Made with tough material and iron spikes, they’ll keep you steady, even in snowy or icy conditions.
Here’s how to use ice grips:
- Slip the toe cap over the front of your shoe.
- Stretch the heel part to fit your shoe.
- Pull the strap across and tighten it.
Ice grips aren’t great for every shoe, like heels, but they’re perfect for turning your regular boots into winter-ready shoes—especially if you’re out there doing winter sports!
8. Using sand and adhesive spray
If you want to make your shoes less slippery, sticking sand to the soles can work, but it can get messy. Sand will eventually fall off and make a mess, plus it’s not great for wet or snowy conditions.
Here’s how to do it:
- Clean the soles of your shoes and let them dry.
- Spray some adhesive spray on the bottom of your shoes.
- Sprinkle clean sand over the adhesive—make sure it’s debris-free.
- Let it dry for a few hours.
It’s a quick fix; just be ready to clean up a little sand later!
9. Using salt and rubber glue
Mixing salt and rubber glue gives your soles some grip, especially on wet surfaces. It’s a pretty simple fix.
Here’s how to do it:
- Clean your soles and let them dry.
- Mix equal parts salt and rubber glue in a bowl.
- Stir it up until it’s all smooth.
- Use a brush to apply a thin layer on the soles.
- Let it dry before you rock the shoes.
That’s it! It's super easy, and it’ll keep you from slipping around.
10. Using masking tape
Masking tape is another quick way to add traction to your shoes, but it can peel off on wet surfaces, and the sticky stuff doesn’t last forever, so you’ll need to replace it eventually.
Here’s how to do it:
- Clean your soles and let them dry completely.
- Cut two strips of tape.
- Stick them in an X pattern on the bottom of your shoes.
It’s an easy fix, but just be ready to swap it out every so often.
11. Using ankle straps
It’s not just smooth soles that make shoes slip—if your shoes don’t fit right, you could still lose your balance and slip, even with non-slip shoes. This is especially a problem with heels, sandals, and clogs.
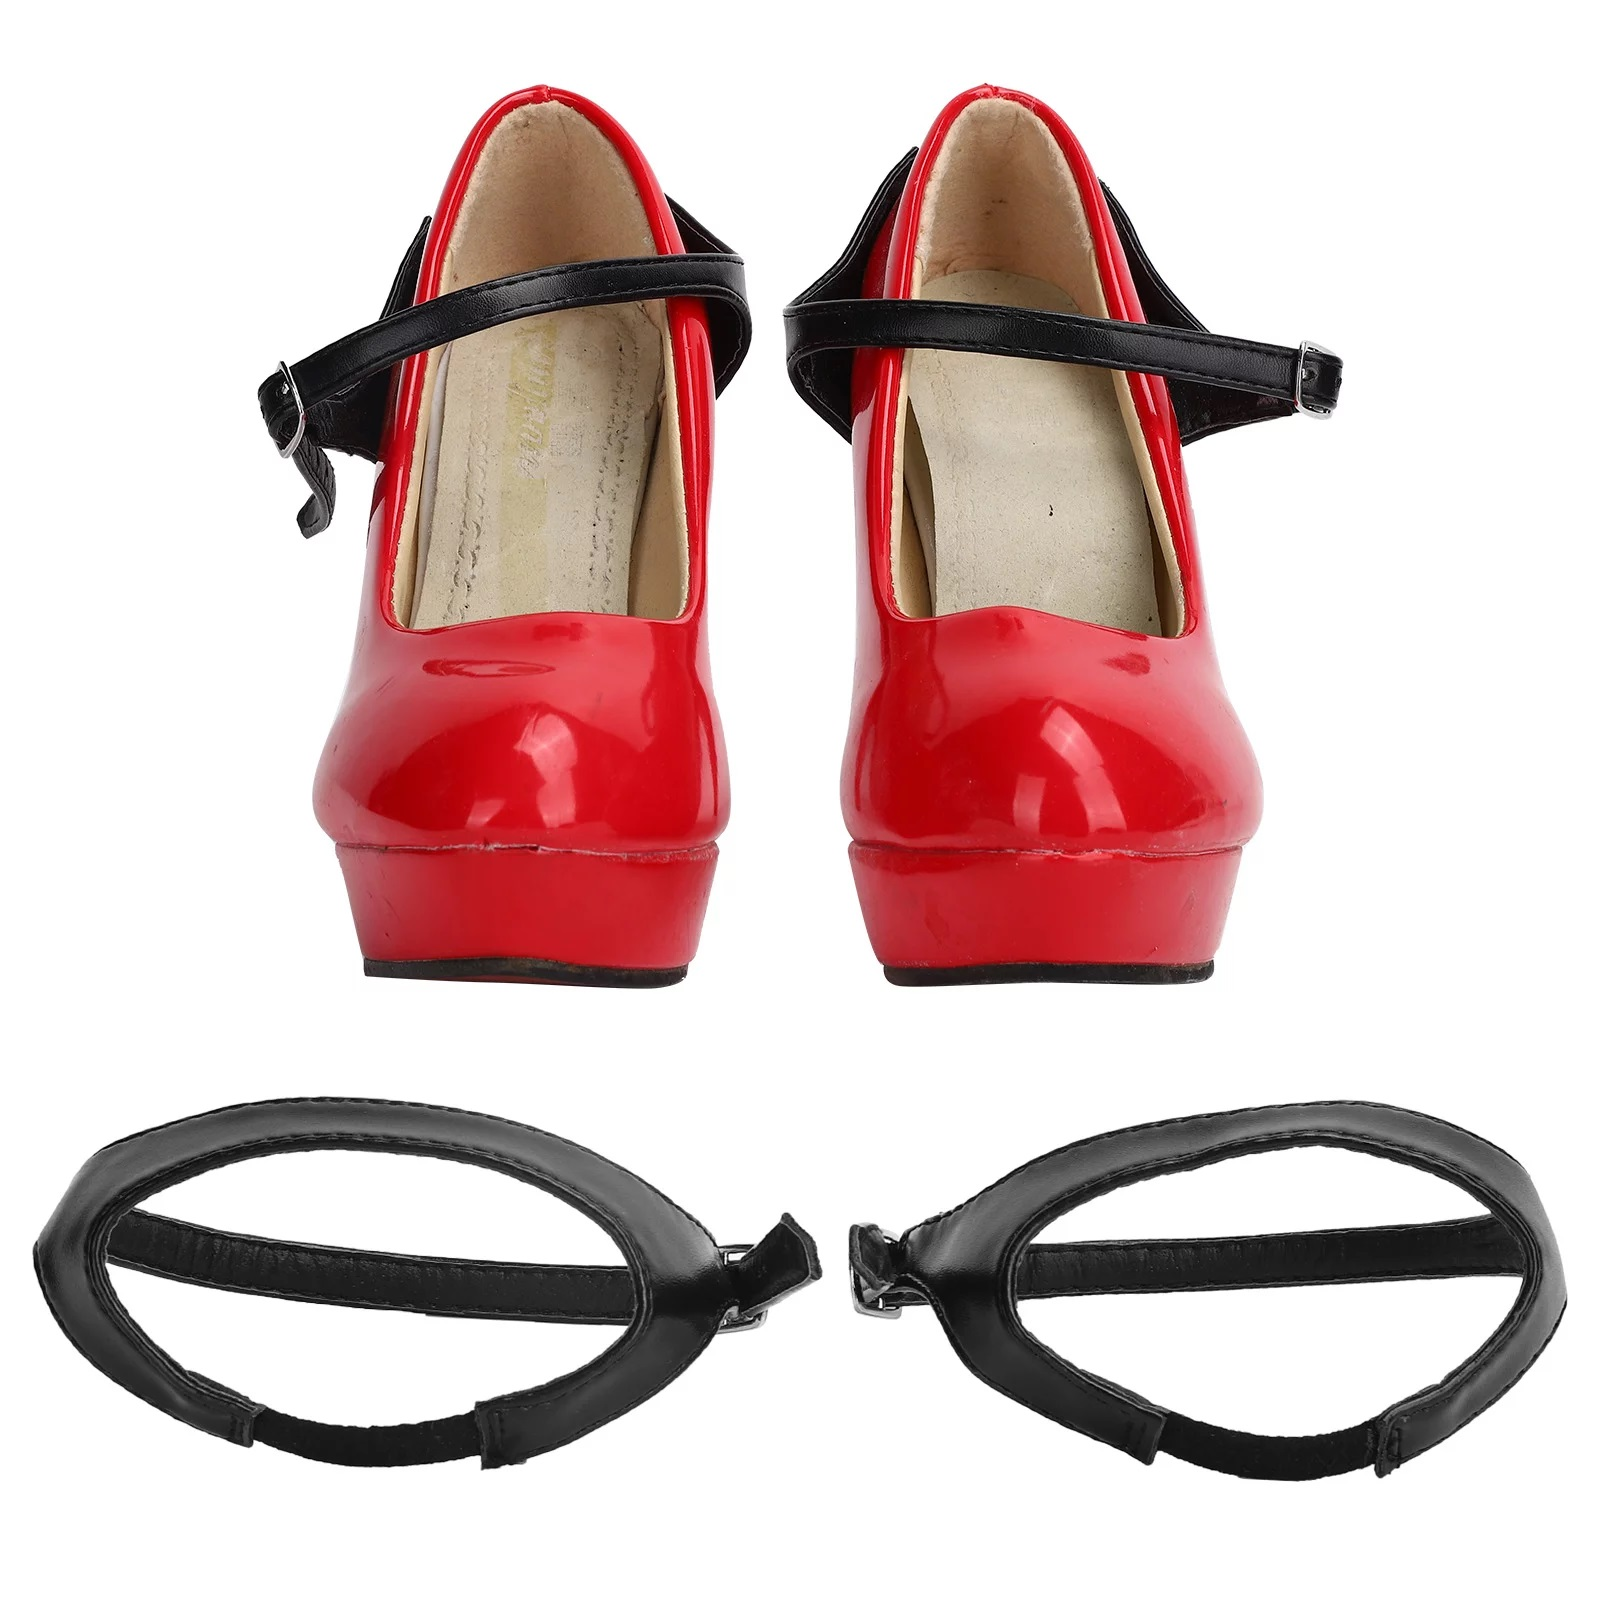
Image Source: walmart.ca
One easy fix is adding ankle straps. They help keep your shoes snug so they don’t slip off your feet. Most ankle straps have sticky pads to attach to the heel, but you can also find elastic, Velcro, or buckle versions.
12. Go to a cobbler
If you’ve got a good pair of shoes you really love and don’t want to mess with, you can always take them to a shoe repair shop or a cobbler. They can resole or modify your shoes to make them non-slip. It might cost a bit, especially if your shoes have a unique design, but it’s totally worth it to keep your shoes in top shape and slip-free.
Frequently Asked Questions on How to Make Shoes Non-Slip
Image Source: ospord.com
1. How do I make my slippers less slippery?
Slippers have softer soles, so you gotta be careful. A simple trick is using a hot glue gun to make lines or dots on the bottom. You can also glue around the heel and toe, then let it dry. Or, use puff paint to add patterns to the sole and let it dry completely.
2. How do you fix slippery heels?
For slippery heels, you can slap on a grip pad on the front and use hot glue on the heel. Or, try hairspray, sandpaper, or a nail file to rough up the soles.
3. How do you make rubber soles slip-resistant?
Rubber soles are usually fine, but after a while or lots of washing, they can get slippery. To fix that, try hairspray, traction spray, hot glue, or just rub them with sandpaper to add some texture.
4. How do I make tennis shoes non-slip?
Tennis shoes need good grip. High-quality ones usually come slip-resistant, but if yours aren’t anymore, try scuffing the soles, taking them to a cobbler to give them a longer life, or just grabbing a new pair.


